

A Simple 7-Step Guide for Tying a Baby Wrap
As a business owner, you need a certain amount of flexibility when it comes to the practical side of being a parent, and a baby sling is a great way to free you up a bit while caring for your little one.
They’re comfortable, breathable, lightweight, supportive, keep your child in eye and earshot, and free up both of your hands — hurray!
However, a baby wrap (or sling — same thing) can be something of a mystery if you’ve never used one before.
Even when you learn the proper way to tie them around your body, it can be hard to trust a flimsy piece of fabric to support your baby, but follow this comprehensive baby wrap guide and all will be well.
What Is a Baby Wrap?
Okay, so I’m going to get started with the baby wrap tying method in just a sec, I promise, but first, I wanted to briefly establish what one is, just in case you’ve never encountered one before.
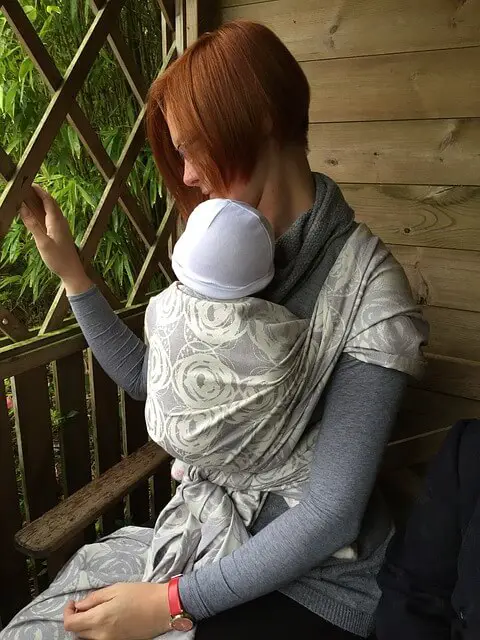
A baby wrap is literally a long piece of stretchy, breathable fabric, that you wrap around your body, then slip your baby into, so they’re resting against your chest.
There can be variations in their design (some have hoops, while others are pre-tied), but for the most part, they just resemble a really big scarf. Take a closer look at a baby wrap here.
The baby-wearing wrap safety protocol is known as T.I.C.K.S…
- T- Tight – Your baby needs to be securely fastened to your body. Loose wraps are a big no.
- I – In View at all Times – You should always be able to see your baby. Never allow them to slide fully underneath the wrap.
- C – Close Enough to Kiss – Can you easily give your baby a peck on the forehead? That’s the way it should be.
- K – Keep Chin off Chest – You should be able to fit two fingers beneath your baby’s chin.
- S – Supported Back – Your baby’s back needs to be held nice and straight by the wrap.
Right then, that’s the definition and the basic safety protocol covered; let’s get started with some tying, shall we?
How to Tie a Baby Wrap

I’m going to guide you through 7 easy steps on tying a baby wrap. It might seem a little tricky at first, but trust me, you’ll be a pro in no time!
Step 1. Finding the Middle of the Wrap
Ideally, your baby wrap will have some sort of marker or label indicating where the center of the wrap is. It’s not essential, but it can help speed up the tying process.
Alternatively, just feed the wrap through your hands until you feel there’s an even length on both sides.
Place the center of the wrap across your chest (not waist). The bottom edge of the wrap should almost reach hip level.
Step 2. The baby Wrap X-Factor
Now you’re going to bring both ends of the scarf behind your back and cross them over into an X pattern on your lower back.
Grab the crossed-over ends and raise your hands just above your head. The X should slide up over your shoulder blades, reaching the base of your neck.
Keep the fabric nice and wide, and bring it over your shoulders. Remember, the T in T.I.C.K stands for tight, so try to keep a good tension as you follow these steps.
If it feels a little loose after you drape the wrap over your shoulders, you can tighten things up by grabbing each end with both hands and pulling up and outward. You’ll feel any slack tighten up around your chest.
Step 3. One More X
The goal here is to cross the ends of the wrap over again to form another X on your front, mirroring the X on your back, but first, take both ends, ball them up, and tuck them through the central panel you established in the first step. Got it? Great; now form the X.
Step 4. Tying the Knot
Bring the ends of the wrap around your hips and behind you, then tie the fabric in a double knot to secure it in place.
If you’ve got a lot of excess length, feel free to wrap it back around to your front and secure it with a double knot there.
Step 5. Preparing the Wrap for Your Baby
Tug on the central panel until it slides down to around your waist rather than your chest. Now find the panel of the frontal X which is closest to your body. That’s going to be your baby’s first point of entry.
Step 6. Baby Lift-Off
With your child facing you, lean them on the opposite shoulder to the X panel closest to your chest that we just discussed.
Leaning back slightly will make things easier and give your baby a little extra support.
Lift the X panel closest to your body and hook it over your baby’s leg to form a strap just behind their knee. Next, stretch out the strap from the back of your baby’s knee across to their opposite hip, so it’s supporting their bum.
Rinse and repeat with the other X panel. At this stage, the whole X should be supporting your baby.
Step 7. Securing the Central Panel
Remember the center panel from the first step? Grasp it, bring it out from under your baby’s legs, and stretch it over the X panels currently supporting your baby, and voilà; you and your little one are ready for an adventure!
If your child gets a bit sleepy, feel free to use one of the X panels to give the back of their head some support, but never cover their face.
That’s a Wrap – Summing Up
You may find that most wraps come with their own tying instructions that perhaps deviate a little from this guide, so feel free to follow them instead, as the wrap might have some sort of special feature like a pocket that needs to be placed correctly.
Just remember T.I.C.K.S and everything will be just fine.
Otherwise, this is considered the standard wrapping method. It’s tried, true, and safe as can be.
I recommend running through it a few times, so you can commit the process to memory rather than having to constantly refer to this guide.
Once you’ve got it down, your life is going to be SO MUCH EASIER!
Let me know in the comments how your babywearing is going!